An Introduction to GitLab Deployment Pipelines
Posted on January 21, 2023 • 4 minutes • 678 words
Table of contents
What is a deployment pipeline
Say you have a piece of code that you wrote, and now you are ready to show it to the world. If your code is a website, what you can do is run the build command of whatever tool you are using, then drag the resulting files and drop them in your favorite static website host. If your code is an API, what you can do is also build these files (depending on what language you are using), then grab the result of the build and upload it to your favorite cloud provider. This process would then need to be repeated for every single change you want to make. Sound tedious? Well yeah, that’s because it is! It’s also error prone, and in large teams is outright not feasible.
This is where deployment pipelines come in. Deployment pipelines are a way to automate whatever process you went through to get your code from your computer and onto the internet for all to see. By doing that, this process is now predictable, repeatable, and scalable. If you have a code repository, chances are you can add a deployment pipeline to it. In this article, I’ll be zooming in on GitLab and how you can setup a pipeline to deploy any project you are working on.
Pipeline basics
A deployment pipeline is a series of steps that need to be taken to prepare your code for deployment, and then to actually deploy that code. This means it should include steps like taking your raw files and building them, then uploading them to the cloud provider.
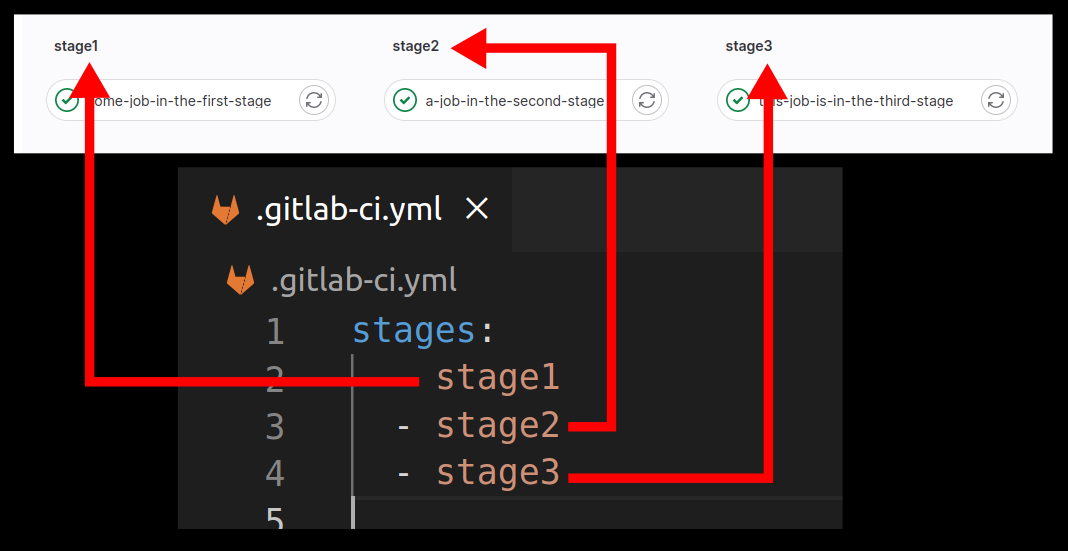
In GitLab, the series of steps looks like this:

In GitLab, they are called stages, and each stage only runs when the previous stage is done. In this example, there are 3 stages called stage1, stage2, and stage3. Inside these stages, you can run jobs that prepare your code for deployment. Feel free to click through the steps and explore this test pipeline on GitLab
. This pipeline can be generated via the following .gitlab-ci.yaml file:
# .gitlab-ci.yaml
stages:
  - stage1
  - stage2
  - stage3

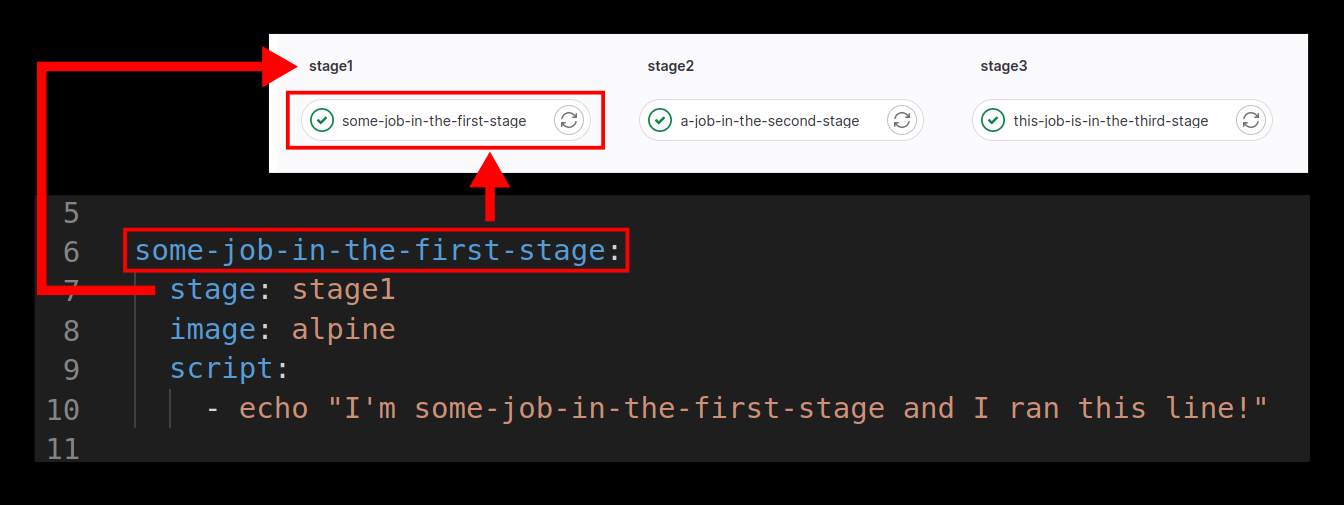
some-job-in-the-first-stage:
  stage: stage1
  image: alpine
  script:
    - echo "I'm some-job-in-the-first-stage and I ran this line!"

a-job-in-the-second-stage:
  stage: stage2
  image: alpine
  script:
    - echo "I'm a-job-in-the-second-stage and I ran this line!"

this-job-is-in-the-third-stage:
  stage: stage3
  image: alpine
  script:
    - echo "I'm this-job-is-in-the-third-stage and I ran this line!"
This particular pipeline has three stages.

The lines after the stages definition define each job. You can have more than one jon in each stage, but in this example, each stage just has one job. The way jobs are assigned to each stage is by setting the stage property on the job itself.

The remaining properties are image and script. The image property specifies the docker container that you will be working inside of. In this case I’m using alpine, which is just a small Linux based docker image. In more complex examples, we could use images with NodeJS installed, for example.
The script property are multiple lines of what you want to do. In this case I’m just printing a line to the console using the echo command, but here is where you would specify the sequence of commands needed to process your code.
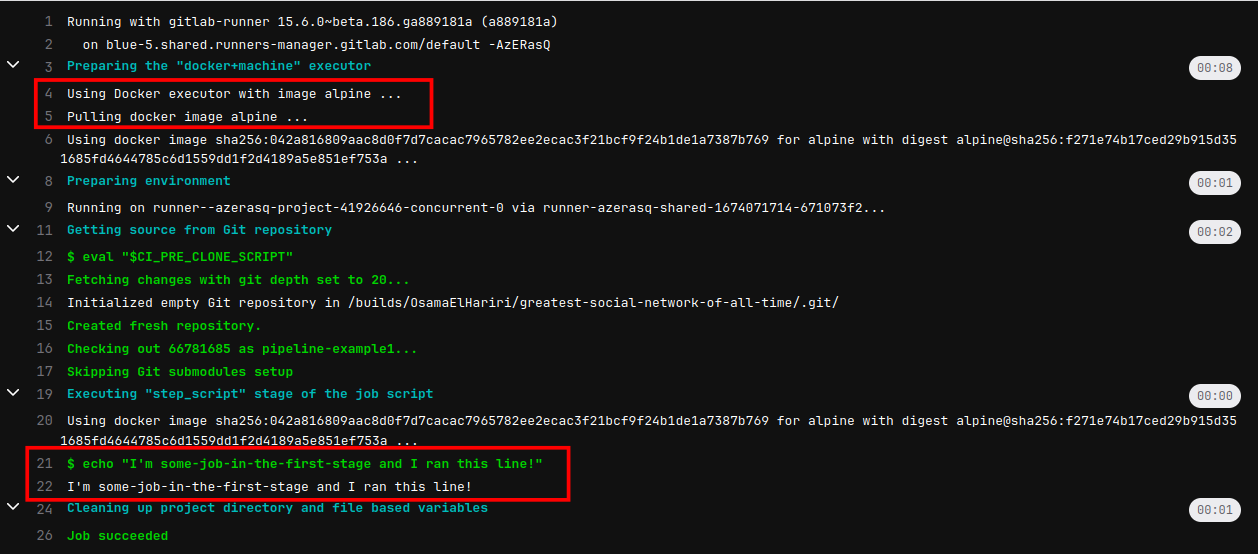
You can see the result of the first job on GitLab
. The first job in stage1 pulls the alpine image, then it runs the echo command:

What is .gitlab-ci.yaml Anyways?
I mentioned that all this is defined in a file called .gitlab-ci.yaml. This file is what tells GitLab that you want to run these deployment pipelines. All you have to do is have this file in the root of your repository, and GitLab will detect it and run the pipelines you define.
Wrapping Up
So we just ran a few echo commands. While that might not sound impressive, the way we did it opens up an insane amount of possibilities. This is just the first step, and in the next blog post, I’ll be walking through actually building and deploying something using these pipelines.

